

Some roofs are easy. Others… not so much. Complicated roofs with steep slopes, multiple planes, hips, valleys, dormers, and add-ons make accurate measurement pretty damn tricky.
The customer wants a proposal NOW. You’ve gotta move fast. But if your measurements are too far off, your estimate (and profits) take a nose dive. So, what’s the best approach?
This article covers both ways to handle complicated roof measurements:
- How roofers have traditionally done it, step by step.
- How modern roofers use aerial imagery and roof measurement reports.
You don’t need to exclusively pick one lane or the other. Based on your comfort level, maybe you want to use reports for some situations and get on the roof for others.
Fast estimates and accurate roof measurements are core to your success, so take the time to get it right. Use this guide to compare both strategies and find the best solution for your own roofing business. Let’s go.
The old-school way: manual roof measurements
Before high-res satellite imagery, roofers had one option: grab a tape measure, climb a ladder, and measure everything by hand.
It works, but it’s time-consuming. Especially if you’re dealing with a complicated hip roof or a multi-section design.
Here’s how the manual process goes for a complicated roof.
Step 1. Get on the roof safely
- Ask the homeowner if there’s interior access. If not, find the best access point, set up your ladder securely, and get on up there.
- Bring the essentials: tape measure, notepad, pen, and maybe your smartphone. You’ll want something to snap photos with and do quick calculations on.
- Don’t take dumb risks — complicated roofs mean steeper slopes and awkward angles. You don’t want to break your leg or worse because you weren’t paying attention.
Step 2. Measure the main sections
- Start with the largest, flattest areas first.
- Record length and width for each roof plane, exactly as they measure. Rounding creates costly mistakes later.
- Write everything down immediately. Relying on memory is always a bad idea: it only takes one mistake to sabotage your whole estimate.
Step 3. Measure hips, valleys, ridges, and dormers
- Complex roofs often have extra features you can’t ignore: lots of valleys, ridges, and dormers.
- Measure reaaaaaal carefully. You don’t want any errors.
- Note extra features too, like collars, vents, pipes, and chimneys.
Step 4. Sketch a simple diagram
Even if you’re snapping pics, a quick sketch makes future calculations way easier:
- Draw the roof shape roughly to scale.
- Label each plane, valley, and ridge.
- Write each dimension right on the drawing.
- Careful of messy penmanship. (Is that a 1, or a 7?)
For complicated roofs, break the roof sections in your sketch down into basic shapes, like triangles and rectangles. It’ll make calculation a lot easier later.
Step 5. Do the math
Now it’s time to turn measurements into something usable. The basics are listed here, but it’s often still best to have specific formulas for each type of roof feature. Experience will help teach you when there are extra quirks to account for in your math.
- Rectangles: length × width
- Triangles: base × height ÷ 2
- Add up all sections to get total square footage
Be sure to include waste factor — 10% is a common starting point, but complicated roofs often need more.
Finally, you’ll figure out the materials, labor, and other costs based on the total area. Without tech tools, this step alone can take a while for anything beyond a simple gable roof.
Alright! Now that we’ve reviewed the old school way of doing it, let’s compare to modern day.
The modern way: measuring complicated roofs with Roofr
Manual measurements work great, but they take time. So much time. And time kills deals.
If you want to stay competitive, especially in big cities or fast-growing areas, moving faster is a must.
These days, with fully-featured roofing CRMs like Roofr, you can measure even the most complicated roof without leaving your desk.
And before you object — yes, this method is accurate. Scarily so. This tech ain’t half-baked. So if accuracy concerns are your only reason for avoiding tech, the excuse doesn’t hold up.
Here’s how it works:
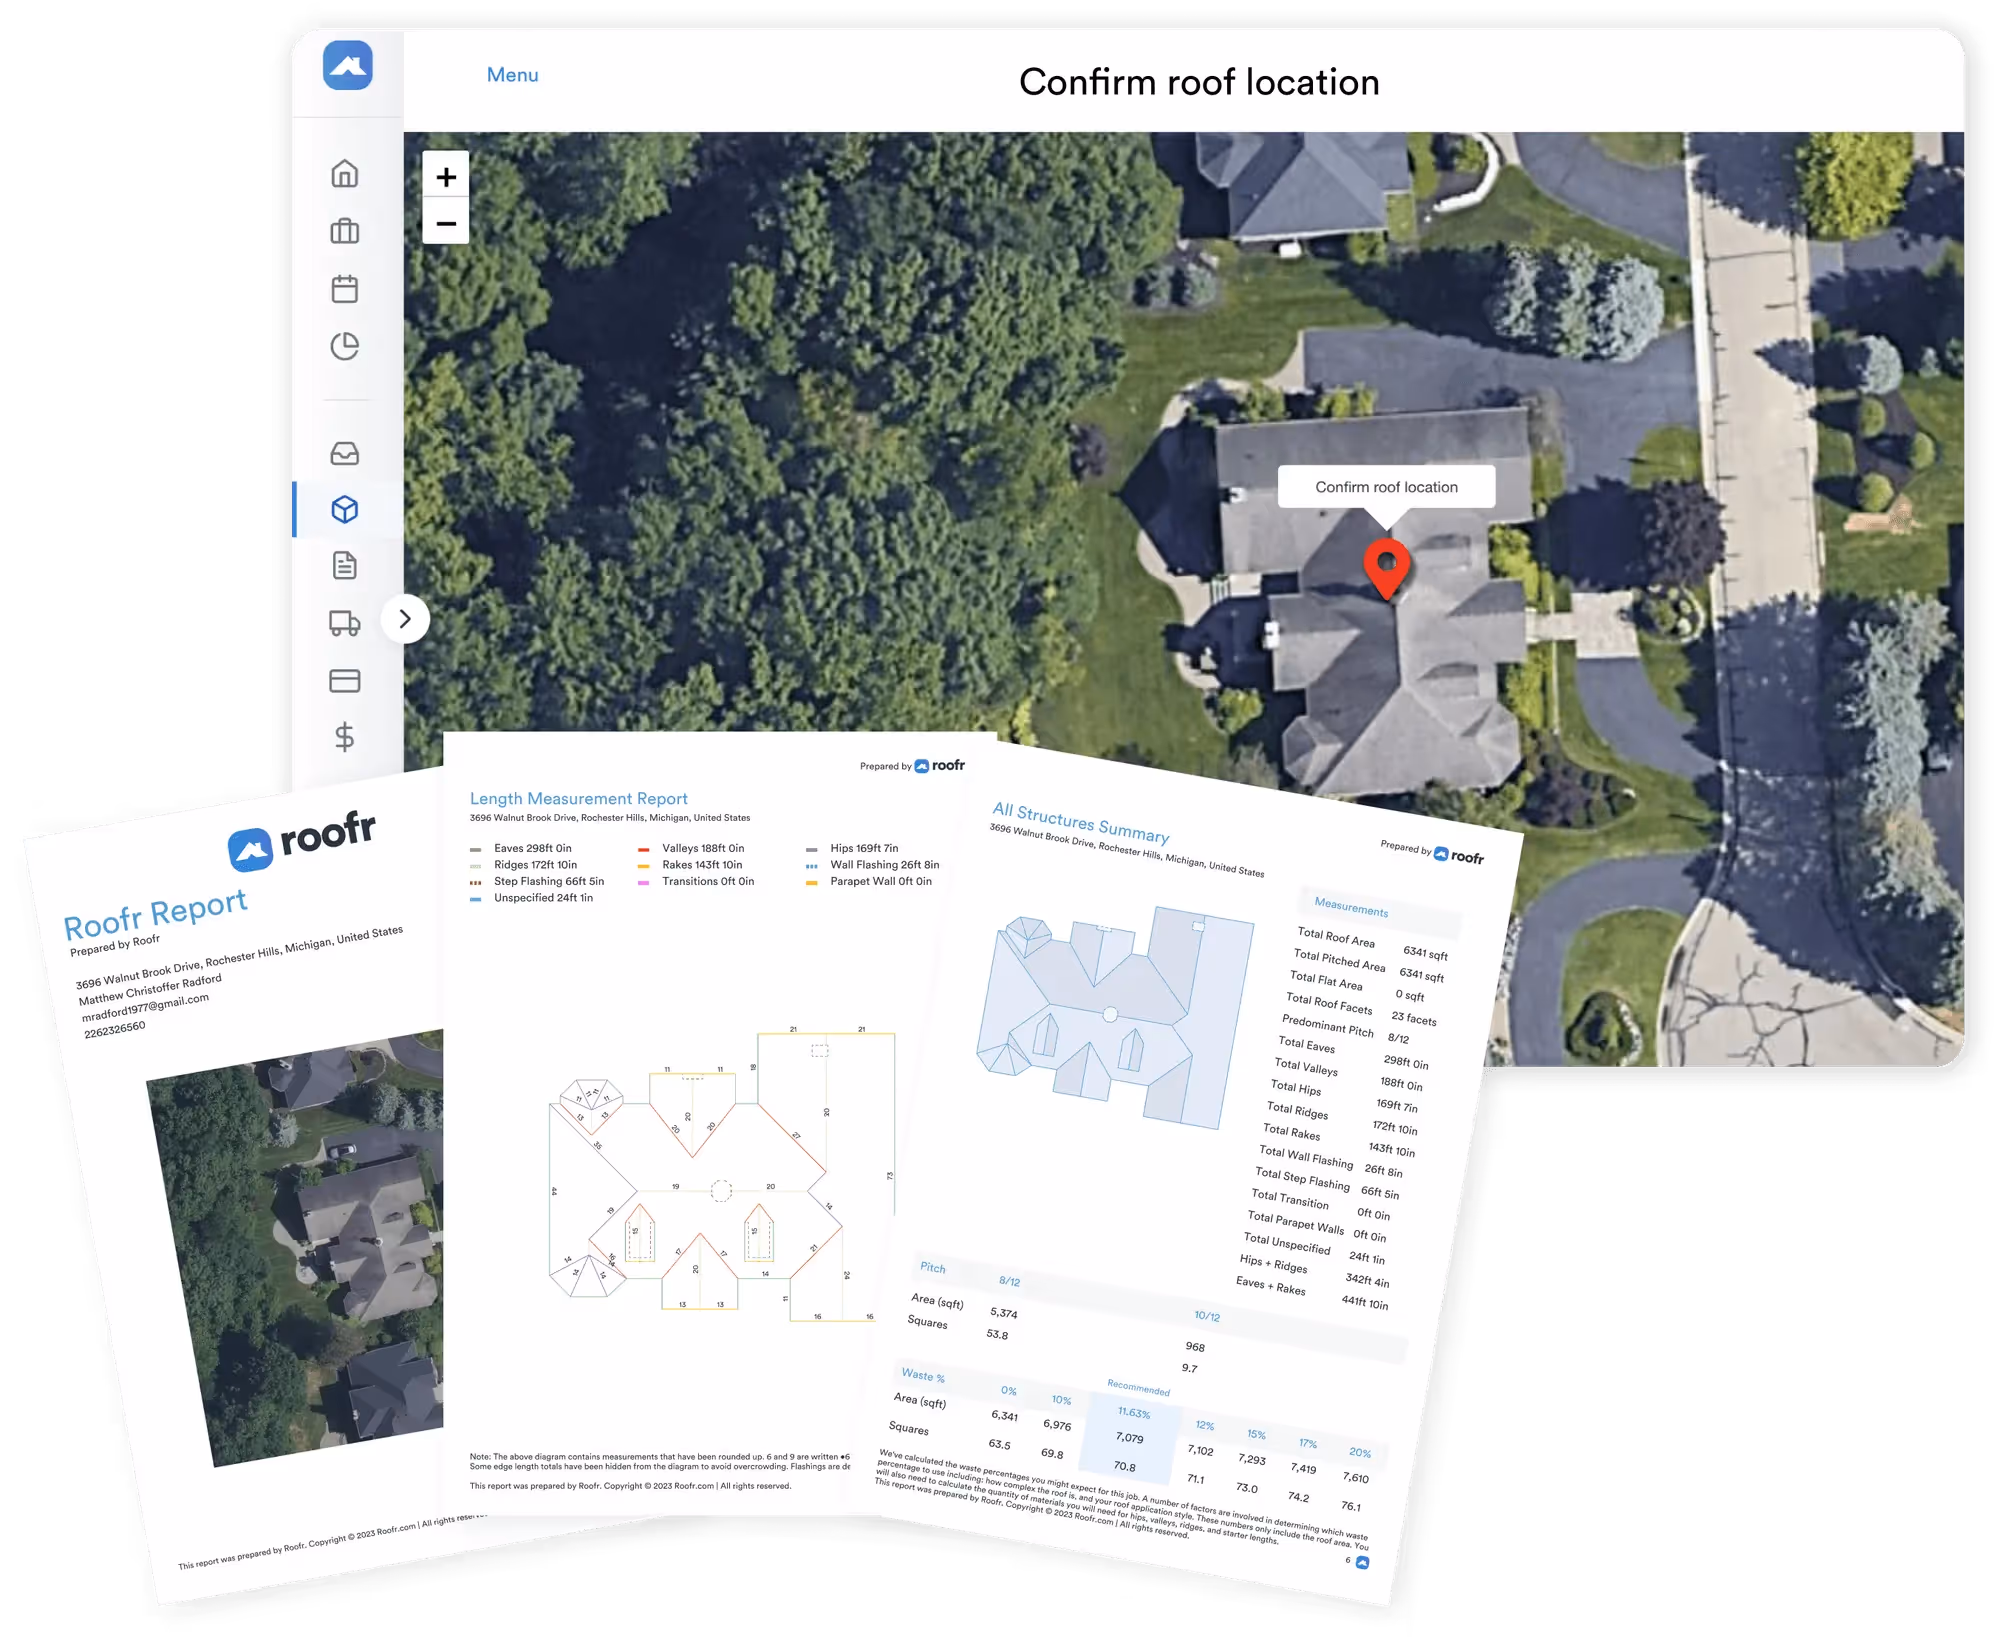
Step 1. Order a Roofr measurement report
- Depending on your plan, reports are as cheap as $13 and can be ready within two hours.
- Search the property address and find any roof in the U.S., Canada, or beyond.
- Roofr gives you options for high-resolution aerial and satellite imagery.
Complex roof layouts, steep slopes, multiple structures? All no problem. It’s shockingly precise, and real easy to get started.
Step 2. Confirm a few details
- Review the property outline before you order.
- Map the roof perimeter, features, and pitch in seconds.
- Make adjustments if needed — add notes or include features like dormers or patios.
These reports give you full control, and rely on your expertise to mark the lil’ details.
Step 3. Get a full report in 2–24 hours
- Delivered straight to your inbox as soon as it’s ready.
- Includes total area, pitch, slope, linear measurements, and a diagram.
- Accurate down to the inch, even for complicated hip roofs or multi-plane designs.
Keep leads warm and get estimates out fast. We handle measurements fast so you can focus on running your business.
Step 4. Close jobs faster
With report in hand, you can:
- Generate polished, branded proposals instantly.
- Base your quotes on effortless, accurate estimates.
- Get your estimate in the homeowner’s hands while your competition is still on the roof with a tape measure.
In the end, roof measurement reports turn hours of work into minutes. They’re reliable. Something you can build your business on.

So, manual measurement, or roof reports?
Alright, let’s be real. Maybe this was still a question when the tech was developing a few years back. But in 2025, the benefits of using tech for complicated roof measurements are just too good to ignore.
Roof measurement reports help your business:
- Quote faster and win more jobs, more easily.
- Reduce errors caused by hand measuring.
- Save time (like, a lot of time) by limiting early on-site visits.
- Impress homeowners with fast, accurate data.
So, is there still a place for hand measurements? Sure, if you’ve got the time and inclination, or if it’s a part of your process that you’re unwilling to give up. You know your business best.
But ultimately, homeowners expect faster, more accurate estimates than ever. And these reports are how you deliver.
Try out Roofr today, and reclaim your time. We’ll handle measurement while you focus on building trust with homeowners and growing your business.