

Sure, we've all used single-ply TP. But how much do you know about single-ply TPO? (That's the only potty humor in this article, promise.)
TPO (thermoplastic polyolefin) roofing is a single-ply membrane system used on flat and low-slope roofs. It's installed by laying rolls of flexible membrane across a prepared deck, then heat-welding the seams for a watertight surface.
And it's one of the most widely used commercial roofing systems in North America.
If you're checking out TPO for a flat roof job, or want a look at the install process, here's your step-by-step installation guide. Plus: an EPDM and PVC comparison, and 2026 cost benchmarks.
What is TPO roofing?
TPO stands for thermoplastic polyolefin. It's a single-ply roofing membrane made from a blend of rubber and plastic compounds: typically ethylene-propylene rubber and polypropylene.
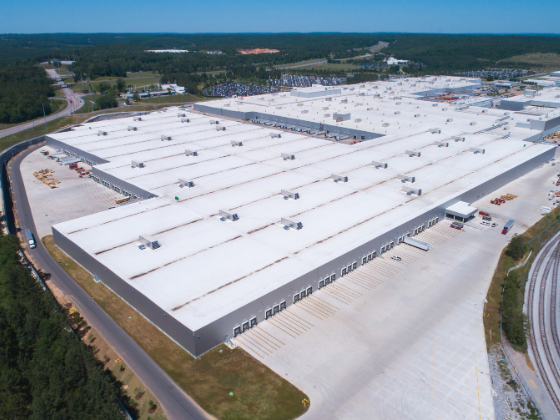
The result is a flexible, heat-weldable sheet that reflects UV rays, handles thermal expansion well, and comes in rolls 10 to 12 feet wide in thicknesses from 45 to 80 mil. It's most common on commercial flat roofs like retail buildings, warehouses, and schools — but it also shows up on residential flat garages and modern low-slope homes.
The layers of a TPO roofing system
From the roof deck up, here's how a complete TPO roofing system is built:
- Roof deck — usually concrete, wood, or steel
- Vapor barrier — stops moisture from getting inside the building
- Insulation layer — usually polyisocyanurate (polyiso) or EPS foam board
- Cover board — optional-ish layer of gypsum or high-density polyiso for more durability and membrane protection
- TPO membrane — the single-ply waterproofing layer, 45–80 mil thick
- Seams and flashings — heat-welded seams are the strongest and most watertight
The quality of the seam welding is THE most critical factor in TPO system performance. A properly heat-welded seam creates a bond that's stronger than the membrane itself. So, installer experience matters a hell of a lot with TPO roofing. Make sure you can do it right.
How to install TPO roofing: step by step
Step 1: Roof deck prep
Before anything else, the deck needs to be clean, dry, and structurally sound. On a tear-off job, remove the old roofing and repair any soft spots, rot, or fastener pull-through.
On a recover job, make sure the existing substrate is flat and secure. No lumps.
Step 2: Insulation install
On commercial jobs, polyiso board insulation goes down first, followed by a cover board (high-density polyiso, wood fiber, or gypsum). The cover board gives the membrane a smooth, firm surface.
Insulation is mechanically attached with screws and plates, or adhered with low-rise foam. Make sure attachment patterns meet local wind uplift requirements.
Step 3: Membrane attachment
Roll out the TPO across the roof starting at one edge. Leave overlap at the seams for welding.
Attachment methods include:
- Mechanical — screws and plates through the membrane edge, covered and welded by the next sheet. Common and cost-effective.
- Fully adhered — membrane bonded to the cover board with adhesive. More labor-intensive. Better for wind-sensitive or aesthetic applications.
- Ballasted — membrane held by gravel or pavers. Used on some commercial jobs.
Step 4: Heat-welding seams
This is the most critical step.
Seams are welded with a hot-air welding machine. Use an automatic robotic welder for long straight runs, and a hand-held welder for details, angles, and penetrations. The welder fuses both membrane surfaces at the overlap into a single piece. A properly welded seam is actually stronger than the membrane itself. The minimum seam width is 1.5 inches.
Test every seam with a probe tool before you finish the job.
Step 5: Flashings and terminations
All penetrations (pipes, HVAC curbs, drains, parapet walls) get flashed with TPO flashing membrane. Use pre-formed pipe boots where possible, and hand-weld custom flashing for everything else. Edges and wall terminations get metal edge trim or termination bar to lock the membrane securely.
Take your time on this step to avoid future problems and callbacks.
TPO vs. EPDM vs. PVC roofing
TPO is the go-to for most flat roof replacements. It's easier to weld than EPDM, cheaper than PVC, and the white membrane helps with energy codes.
Go for EPDM when the budget is tight. Use PVC when chemical resistance is needed. Think rooftop grease exhausts.
Common TPO installation mistakes to avoid
- Under-welded seams: This is the leading cause of TPO failures. Always probe test your seams.
- Bad insulation attachment: Your fastening pattern should meet local requirements for field, perimeter, and corner zones.
- Insufficient slope: TPO doesn't fix drainage problems. Ponding water will take down any membrane over time.
- Rushed penetration: A cheap pipe boot installed badly will cause a $5k water damage claim. Take time to do it right.
- Skipping cover board: On mechanically attached systems, going membrane-to-insulation causes the membrane to pucker and create stress points.
Pair TPO with the right CRM
TPO is cost-effective, reliable, and an especially great option for large commercial buildings. Knowing your materials, and choosing the right ones for the right jobs, is an important piece of the puzzle.
The other piece is how efficiently you run your roofing business. That’s where Roofr can help.
TPO roofing FAQs
Is TPO roofing good for residential homes?
Yes. It's great for flat or low-slope residential applications: garages, additions, modern homes. More durable and easier to weld than EPDM.
How long does a TPO roof last?
20–30 years with good installation. Lifespan depends on membrane thickness (80 mil > 45 mil), installation quality, and roof traffic.
Can TPO be installed over an existing roof?
Yep, in most cases. A recover install is common on commercial jobs. The existing roof must be structurally sound and relatively flat. Check local codes, since in some places a full tear-off is required after a certain number of layers.
How do you repair a TPO roof?
Fix small punctures and tears with TPO patch material and a hand welder. Larger issues involve cutting out the damage and welding in new material. A good repair is nearly invisible and should outlast the surrounding area.
How much does TPO roofing cost per square foot?
As of mid-2026, TPO roofing costs homeowners around $6–$10 per square foot installed, including labor and insulation.
What are the pros and cons of TPO roofing?
Pros: energy efficiency, reasonable cost, strong seams, flexible in cold weather, recyclable.
Cons: quality varies by manufacturer, not ideal for chemical exposure, white surface shows dirt over time.