Overview:
Proposal templates allow you to create customizable templates for multiple types of proposals. The re-usable, editable templates enables you (or your team in the field) to create proposals extremely quickly by pulling items directly from your catalog. You get accurate proposals that deliver trust and transparency to homeowners, in half the time it takes to do it manually.
With templates you can;
- Pre-populates items and their coverage, unit costs, and tax when creating a proposal
- Allows you to create proposals in a few clicks
- Allows you to include additional pages (Terms & Conditions, etc.)
Prerequisites:
Available On: Free, Pro, Premium & Elite Plans
Create a Template
Step 1: Start from Scratch
- In your left side navigation click Proposals
- Then, select the Templates tab to open your template library. Here you will be able to edit existing templates, or create a new template.
- Select + New Template

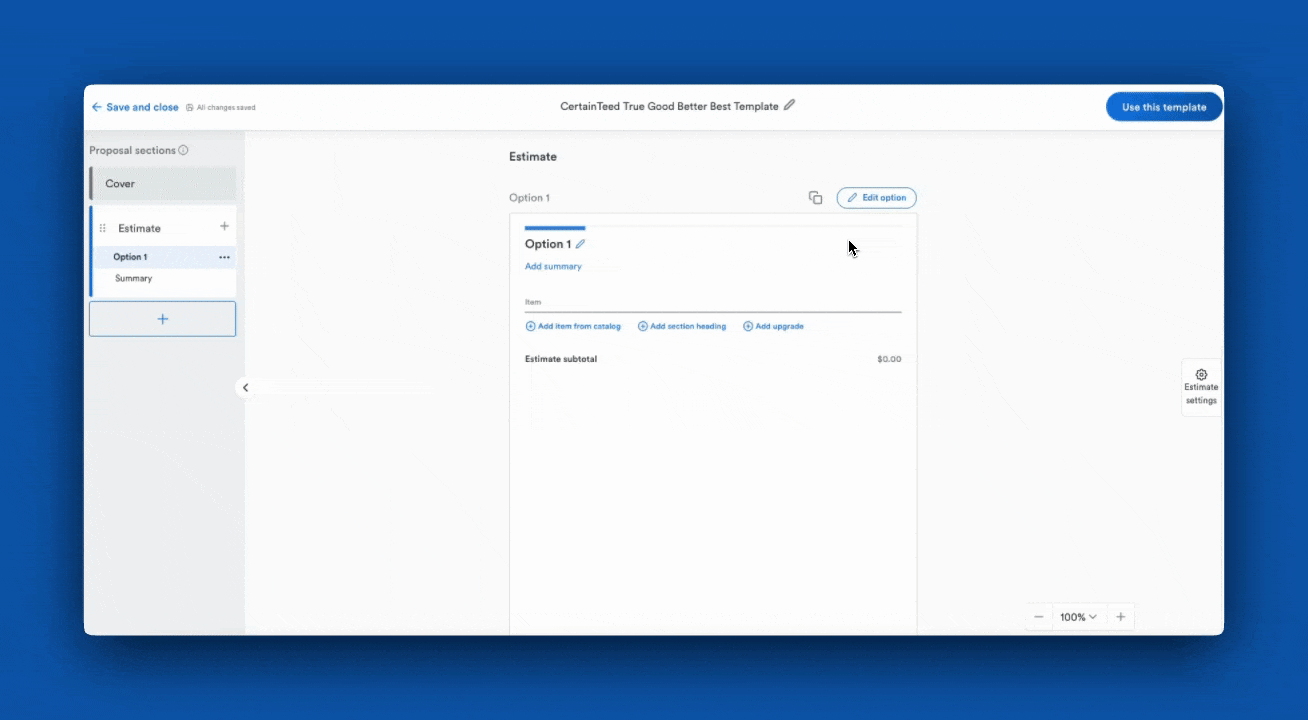
Step 2: Name and Save the Template
- Use the edit icon to name your template and click Confirm to save it.
- Make sure you use the specifics of the template to tell it apart from others.
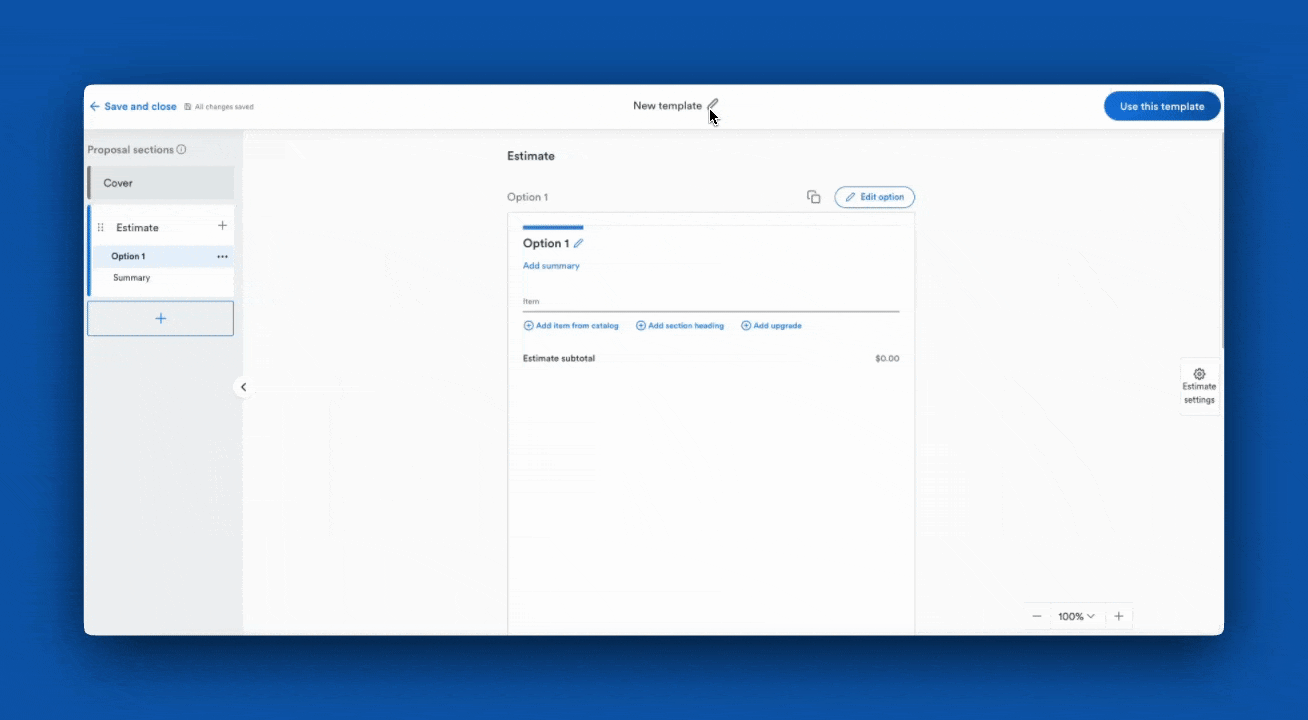
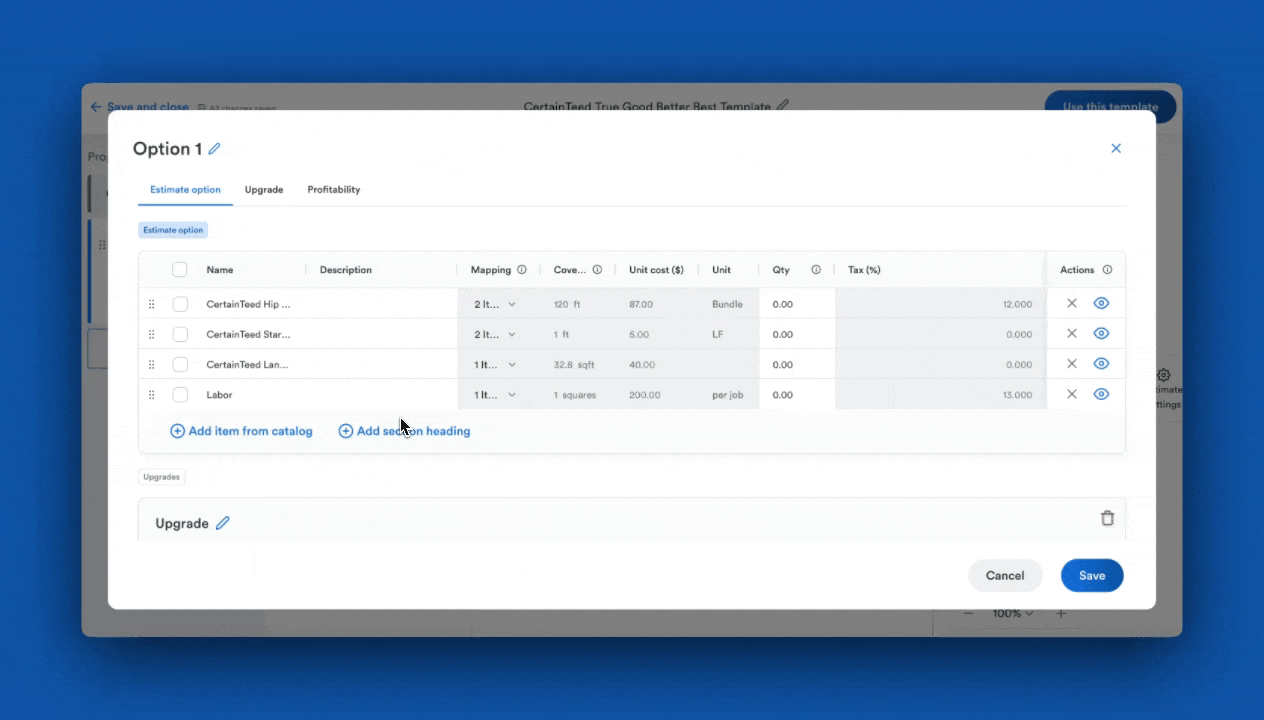
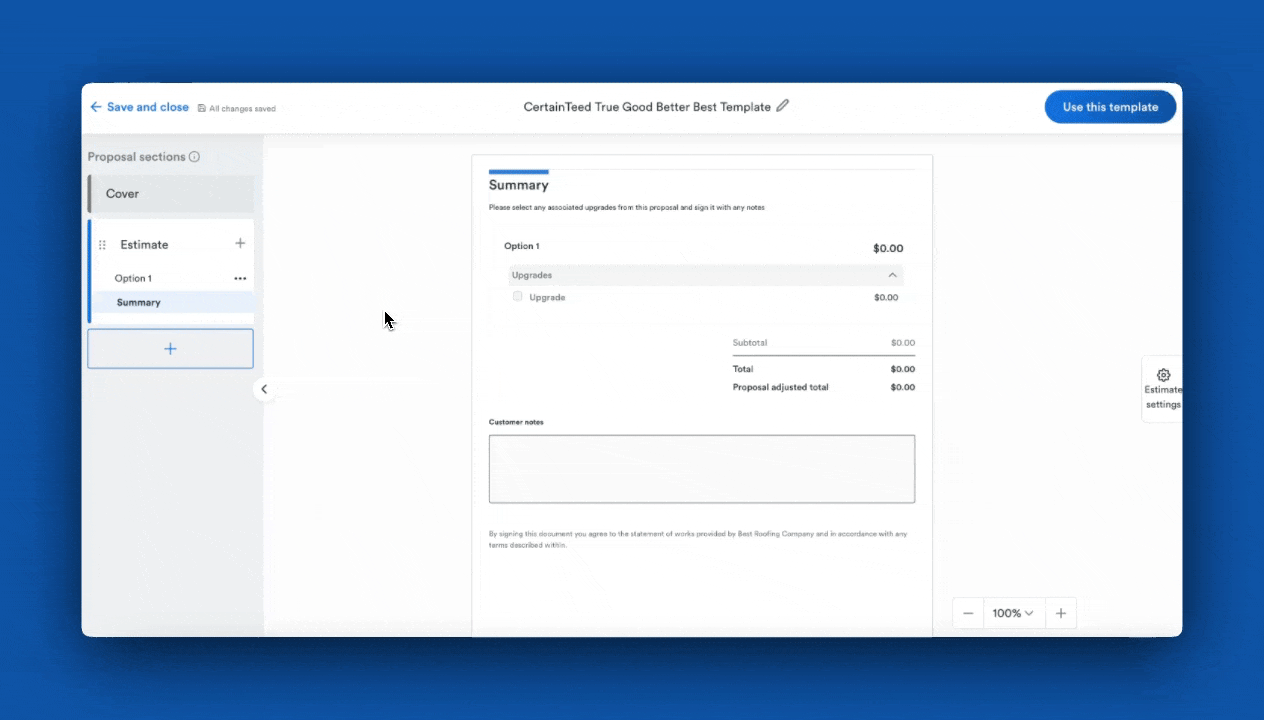
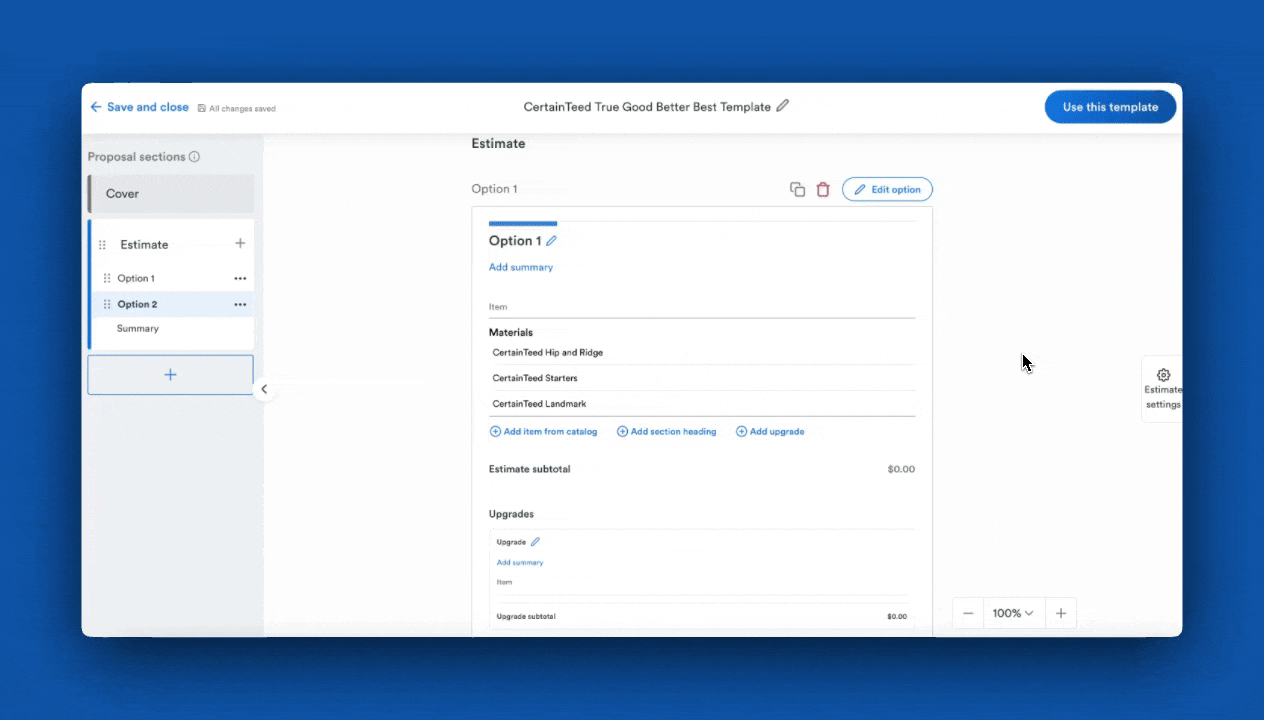
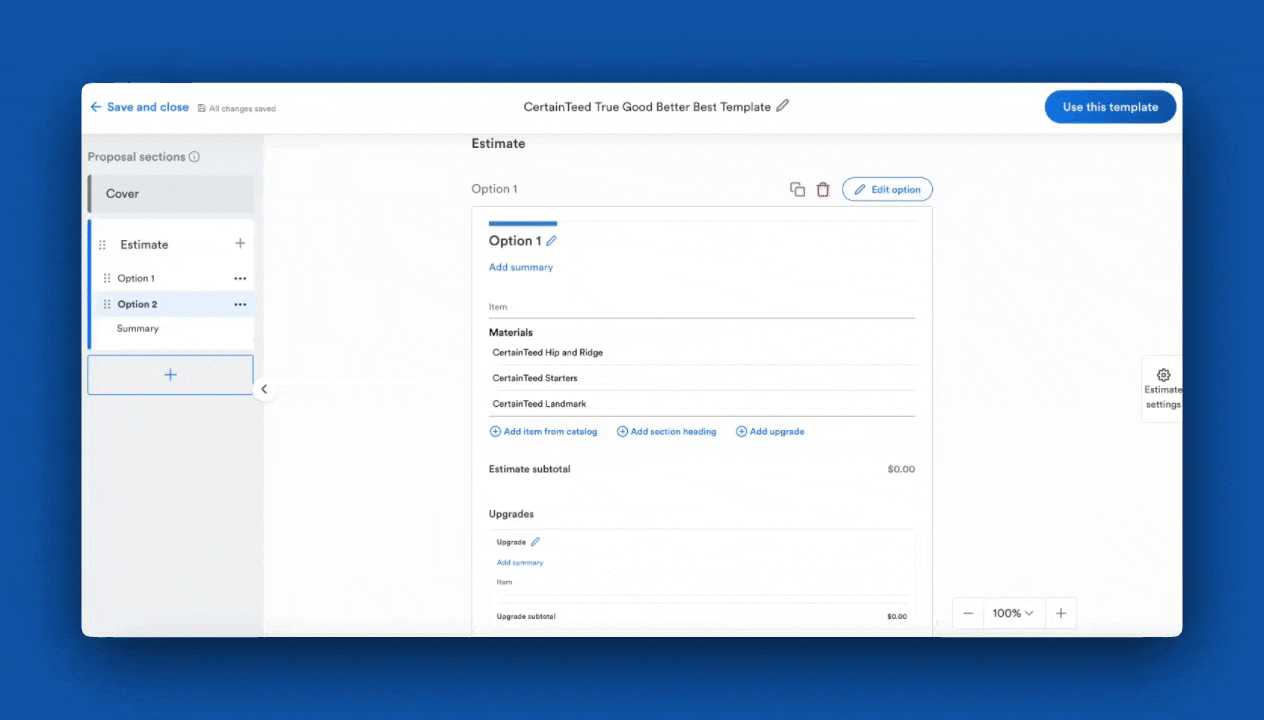
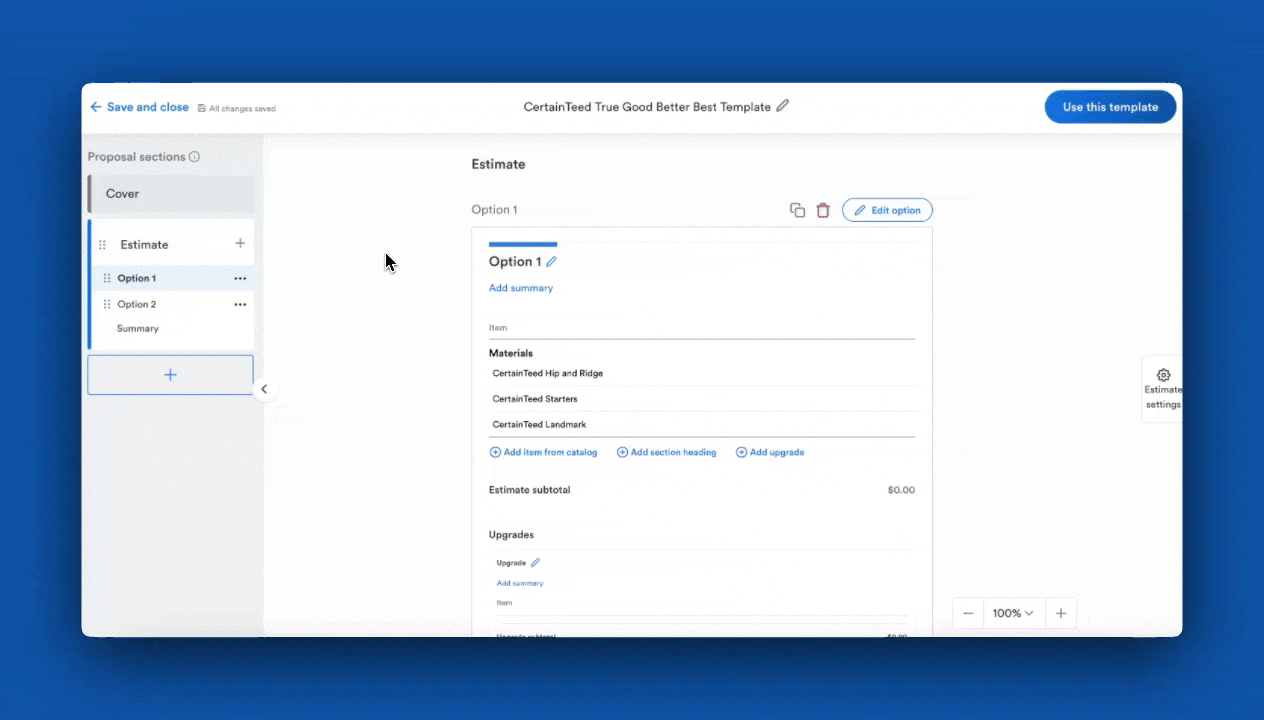
Step 3: Add Line Items
- Your estimate can have multiple options. Each option is edited separately in order to customize your proposals and offer homeowners flexible options for their roof.
- Click the Edit Option button and an editor will appear.
- When creating a proposal template items must be added from your existing catalog. Use the + Add item from catalog button to search for and select items from your catalog.
- Note: The rest of the item’s information like measurement, coverage, unit cost, and tax should pre-populate based on the information you included in your catalog.
- Repeat this step for as many items as you would like to add to the specific option.
Step 4: Add Sections (Optional)
- With an estimate option you can create section headings to group items into categories and create clear sections in your proposal with things like materials, labor, and equipment.
- Click + Add Section Heading and name the section.
- You can add multiple section headings to an option and simply drag-and-drop them into place. Items can also easily be drag-and-dropped to sections.
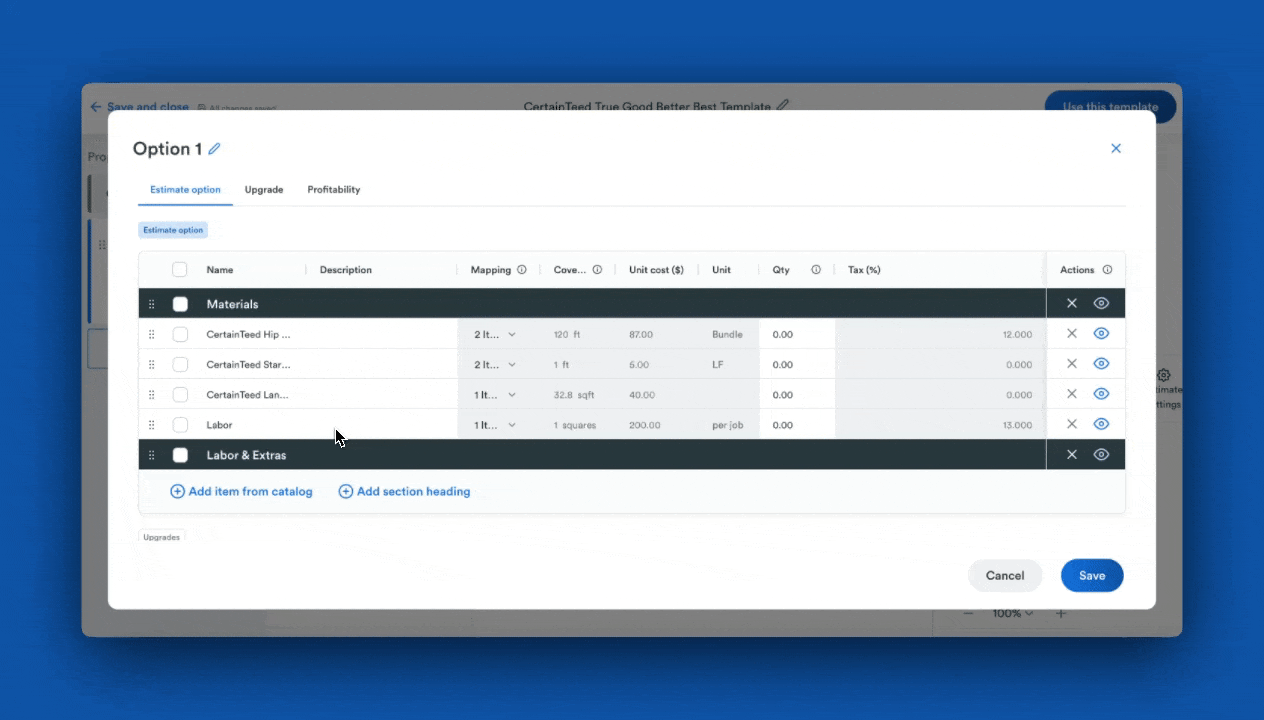
- To delete an item from the option, simply click the X on the line item.
- Be sure to save your option before moving on.
Step 5: Create Additional Options
- As mentioned, you can add multiple options to your proposal template. Each option is add and edited individually.
- To create another option, click New Option under Estimate in the editor on the left hand side.
Edit Pricing Settings
Step 1: Open your Default Settings
- You can edit your default pricing setting at any time by clicking on ⚙️ Estimate Settings. This will apply your pricing settings to all proposals created from this template.
Note: Estimate Settings applied to the template will be the default settings to new proposals created from this template. Settings can also be adjusted later on an individual proposal.
Step 2: Customize the Settings
- Here you can choose the relevant options including:
- Whether profitability is calculated by margin or markup
- Visibility of the line items on the customer-facing proposal
- The ability for customers to select multiple options on the proposal
Note: Estimate Settings are applied to the whole proposal – not individual estimate options.
Adding Sections to the Template
Step 1: Add a New Section
- You can add additional sections to the template by clicking the + button under the Estimate section.
- Here you can add additional information to your template like uploading a manufacturer's brochure as a PDF, and About Us page that introduces your company and your team, terms and conditions sections – you name it.
Note: Remember that your proposal is a compliment to your sales pitch. Avoid unnecessary sections that distract the homeowner while providing enough information to help them feel informed. Trouble striking the right balance? Talk to one of our product experts for help optimizing your proposals. Book a call.
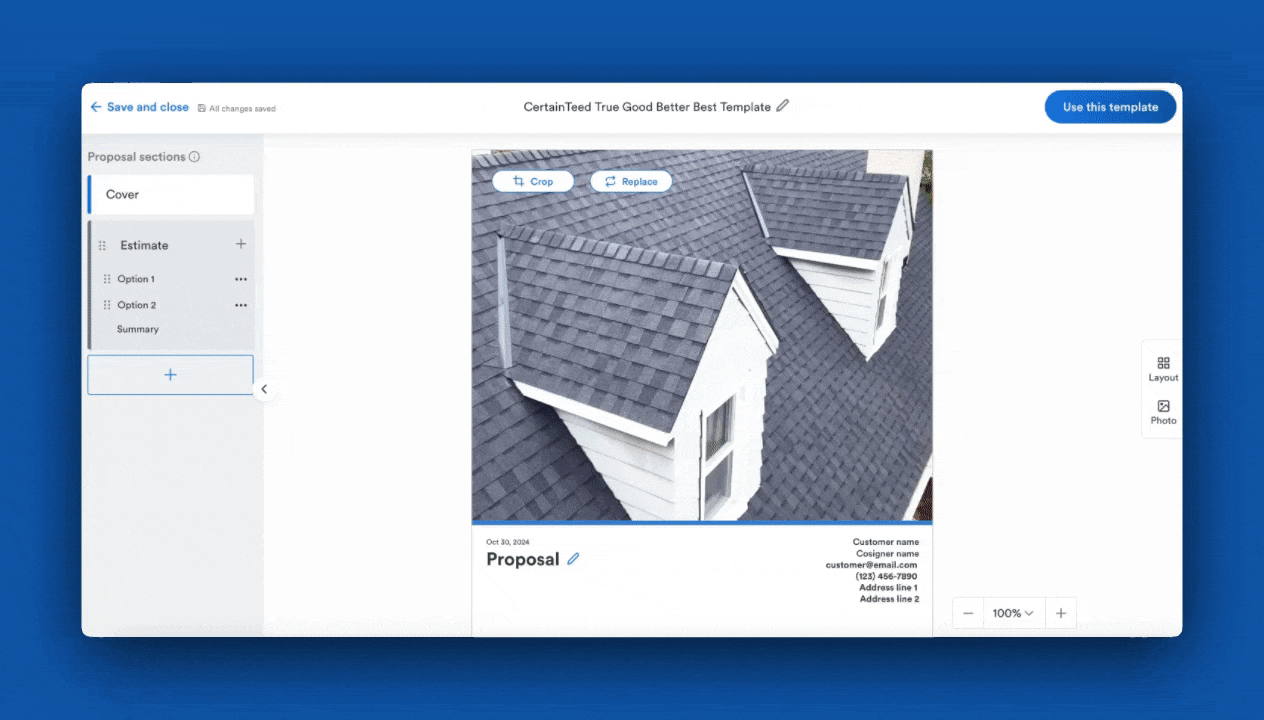
Editing the Cover Image and Layout
Step 1: Open the Cover Section
- You can easily customize your proposal template using the cover layout options.
- To start, select Cover from the editor on the left hand side.
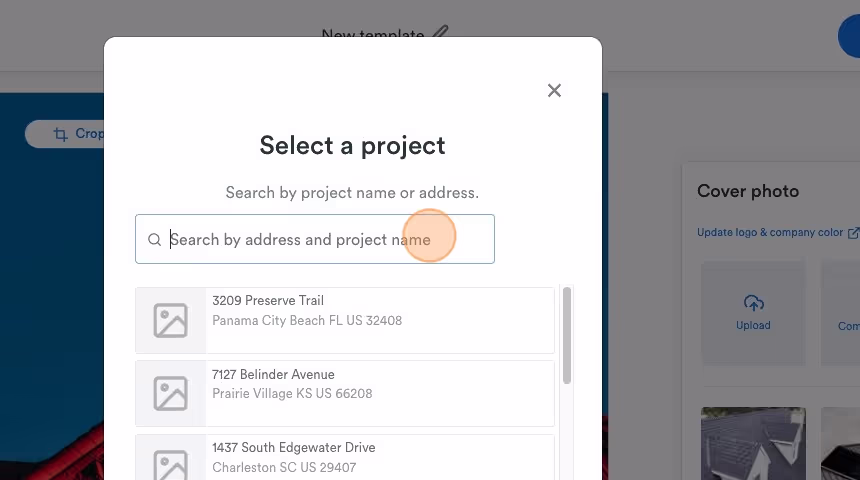
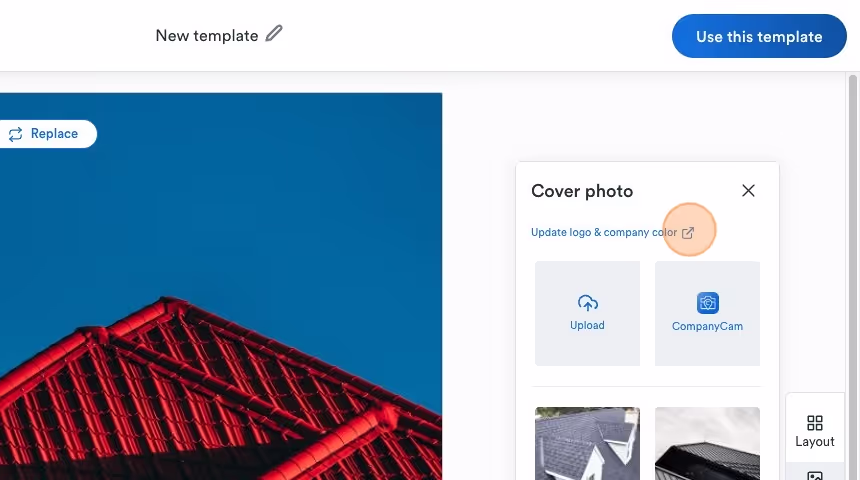
Step 2: Start with an Image or Layout
- We'll start with the image. On the right hand side of your proposal you'll see an image icon. Click the icon that says Photo to open the image options.
- There are three options for cover images:
- Roofr default images
- Upload your own image from a file
- Upload an image from CompanyCam
- If your CompanyCam account is connected to Roofr, select CompanyCam from the cover photo options, then search for your project.
- If not, connect your CompanyCam to Roofr in 3 easy steps:
- In your Roofr account go to Settings > Integrations
- On the CompanyCam integration click Connect
- A page will appear asking you to authorize your account. Click Authorize.
Note: Your cover image will automatically display your logo, branding and contractor license number from your company profile in your global settings. You shouldn't need to, but in case you want to, you can open your company profile in a new window to make any changes.
Step 3: Change your Cover Layout
- Choose the Layout icon to open the options.
- Select the cover layout you prefer
- Here you can also crop the image to make it work with the layout you've selected, or replace the image altogether.
Note: You can play around with different images and layout options to find what works for you.
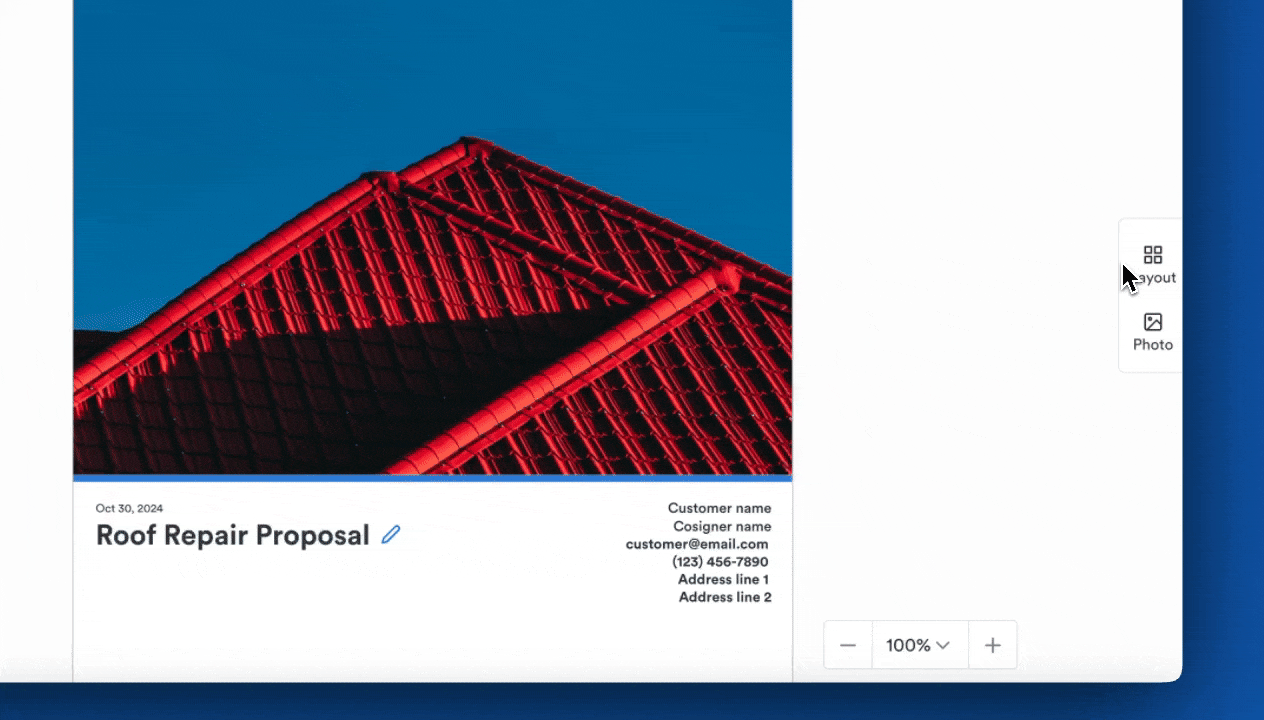
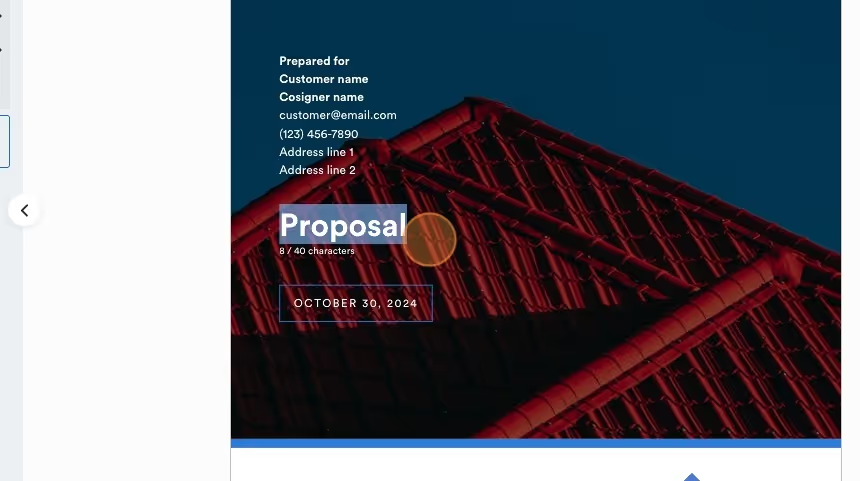
- You can also change the title of your proposal by clicking on the Edit icon on the cover.
- Remember, this is a template and will be used to quickly create proposals so don't make the title too specific.
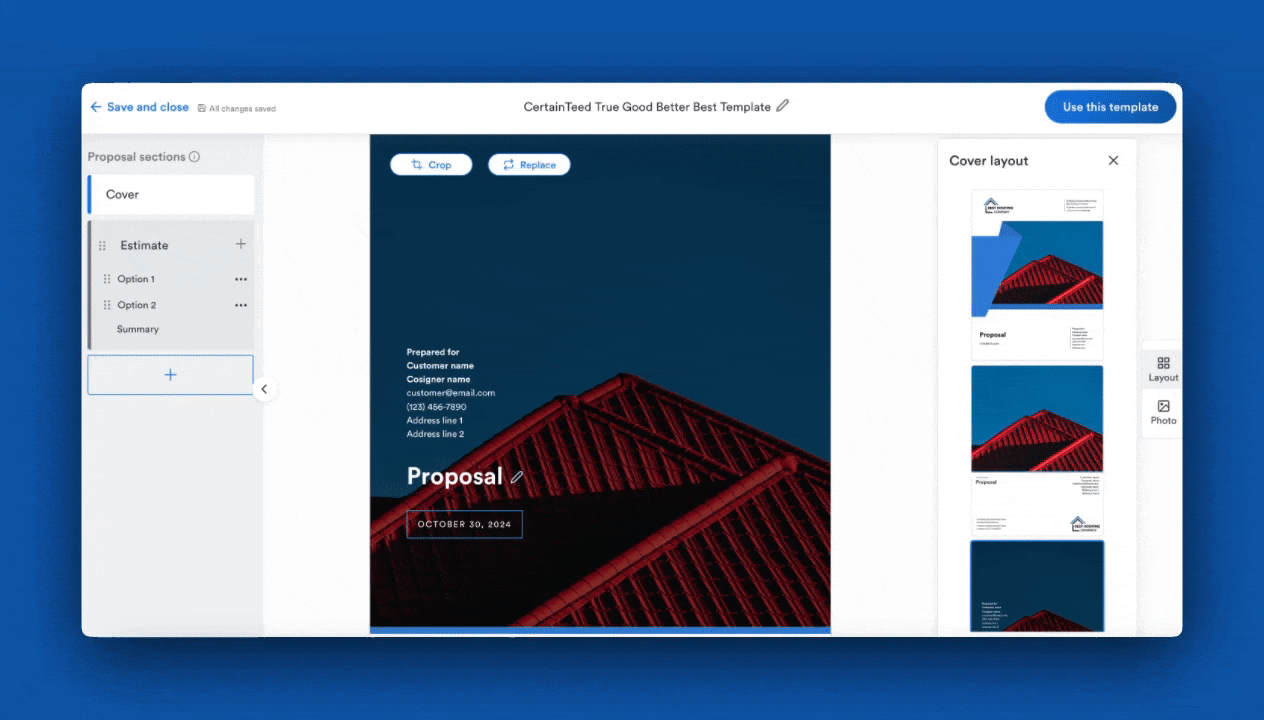
Note: On each layout option you'll see a section that says "Prepared for" followed placeholder text for your customer information. These details (and the proposal date) will automatically be populated from your customer record when you're creating a proposal. This allows your proposals to always be tailored to your customer, without any manual updates. You don't need to make any changes to this section.
Step 4: Save and Close
- Once you're happy with your template, hit Save and Close to return to the template library. Your template is ready to use, or can be edited at any time.