What it does: Allows you to add pitch to a Roofr measurement report.
Purpose: Adds pitch to a report to create more accurate measurements and material calculations.
- Update and ensure the pitch is correct after manually viewing the roof on site.
- Send off accurate and fully complete reports to potential clients.
Prerequisites: An existing pitchless Roofr report.
Available On: All Plans (Pay-as-you-go, Pro, Premium & Elite)
Adding Pitch to your Report
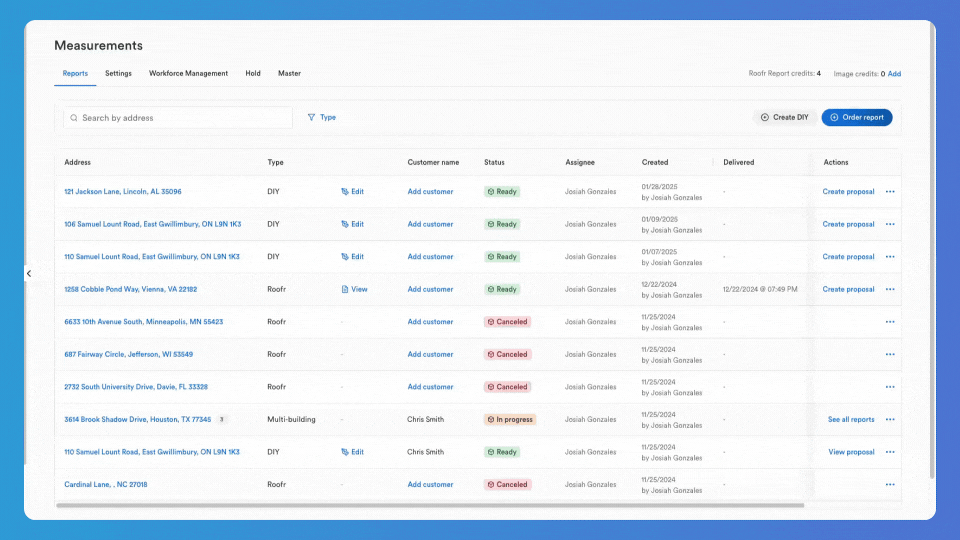
Step 1: Select Your Report
- In the measurements tab in your Roofr Dashboard, click the hamburger menu of the measurement you would like to add pitch to.
- Select ‘Edit Report’
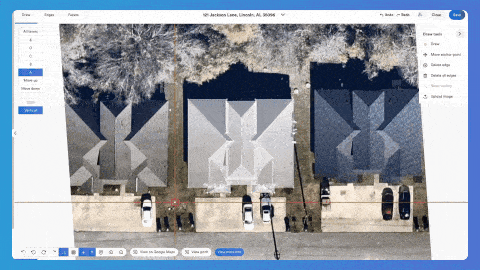
Step 2: Use Pitch Tool
💡 If you already know the pitch(es) of the roof, skip to step 3.
- Select the ‘view pitch’ button at the bottom of the view screen.
- Line the pitch tool up squarely with the edges of the roof. In this example, we see that the closest values are seven - twelve and four - twelve.
- To return to your drawing, close the pitch finder tab.
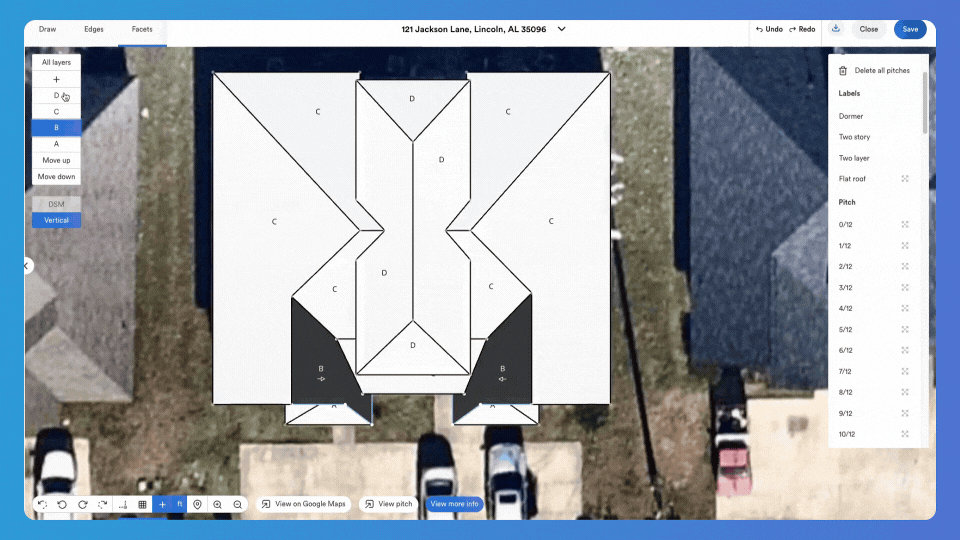
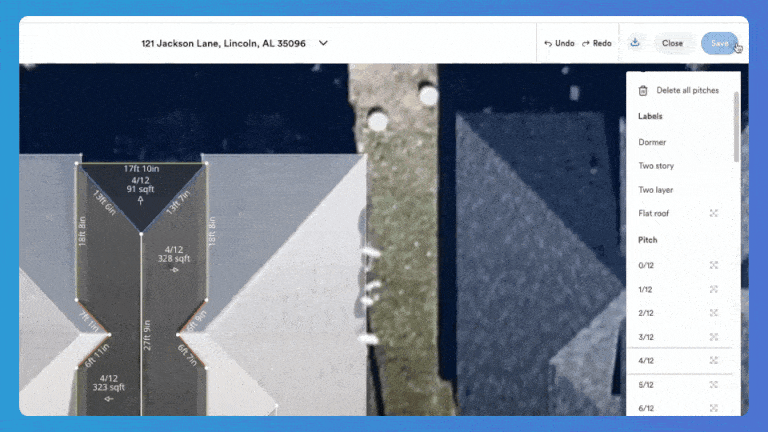
Step 3: Add Pitch to Facets
- Click the facets tab at the top left of the viewing screen.
- Select the layer that you wish to edit.
- Click the chosen pitch value in the right panel, then click into the facet you would like to add that value to.
- Repeat for each layer.
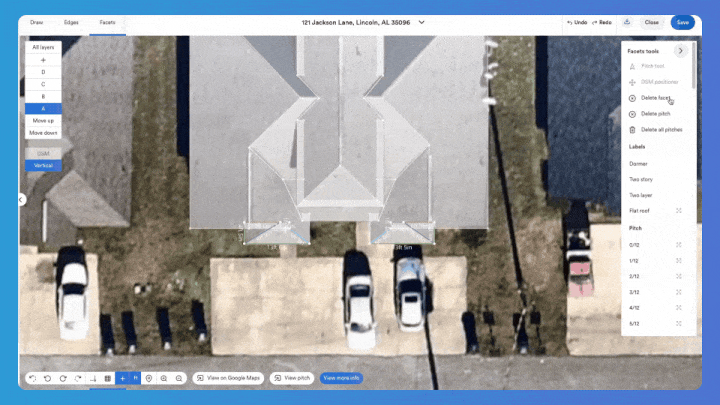
💡 Pro Tip: You can apply a pitch value to an entire layer by selecting the layer and then clicking the bounding box next to the pitch value.
Step 4: Save and Download
- Click the ‘Save’ button in the top right corner as you make changes.
- To download your edited report, click the arrow in the top right corner and select ‘download pdf’.
💡 Your report will now include the pitches you have added into all calculations of the roof.
What’s next?
Learn how to draw a Roofr Report yourself HERE